In a previous post, I put together a script for solving a linear optimisation problem using Google’s OR-tools. This python script is callable from the command line and you kinda need to know what you are doing and how to organize the parameters.
So, in order to address this difficulty, I wanted to build a web front-end for this script, so that regular humans can interact with it.
We can generalize this problem as how to build a web interface for a python script.
First of all, we can split the concerns. What we need is a web page that serves as a user interface, and a web API connecting the webpage to the python backend.

Ideally, this API should be as light as possible. After all, the heavy lifting is going to be performed by the backend. Using Django would be easy but also overkill. I was looking for one of these microframeworks, you know, like Flask. And that’s how I got to Falcon.
Falcon is like 10 times faster than Flask, it is as bare bones as you can get insomuch as you need to bring your own WSGI server, like gunicorn (but you can use Waitress in Windows, or uWSGI).

TL;DR
1 Installing the dependencies
pip install falcon cython gunicorn
2 Creating a JSON output for the script
My plan was to use JSON to exchange data between the API and the webpage. So I needed a JSON response builder. I could add this functionality to the previously created python script, but I prefer to have it in a separate file which basically calls the main method of the solver script and returns a JSON payload.
import json
import interview_grocery_startup as igs


def get_json_response(cfg, what):
    results = igs.main(cfg, what)

    solver = results['solver']


    if results['result_status'] == solver.OPTIMAL:
        response = {'result_status': 'optimal answer'}

        variable_list = results['variable_list']

        print solver.wall_time()
        print solver.Objective().Value()

        response['wall_time'] = solver.wall_time()
        response['objective_value']= solver.Objective().Value()

        response['variables'] = dict()

        response['variables_sum']=0
        for variable in variable_list:
            response['variables'][variable.name()]= variable.solution_value()
            response['variables_sum']+=variable.solution_value()

    elif results['result_status'] == solver.INFEASIBLE:
           response = {'result_status': 'infeasible'}
      elif results['result_status'] == solver.POSSIBLE_OVERFLOW:
        response = {'result_status': 'overflow'}

    json_response = json.dumps(response, sort_keys=True)

    return json_response

def main(cfg, what):
    json_response = get_json_response(cfg, what)
    print(json_response)
    return json_response
3 Coding the API
The principle for creating an API in Falcon is very easy to understand: you define a class and then instantiate it and link it to a route. This ends up being very convenient and clear. You can define the routes and the methods as you please.
import falcon
import json
import interview_grocery_startup_json as igsj

class InterviewGroceryStartupResource(object):
    def on_get(self, req, resp):
        #Handles GET requests

        resp.status = falcon.HTTP_200  # This is the default status

        resp.body =  igsj.main(cfg,cfg['what'])

    def on_post(self, req, resp):
        try:
            body = req.stream.read()
            body_json = json.loads(body.decode('utf-8'))
            cfg = body_json["cfg"]
        except KeyError:
            raise falcon.HTTPBadRequest(
            'Missing Config',
            'A config (cfg) must be submitted in the request body.')

        resp.status = falcon.HTTP_200
        resp.body = igsj.main(cfg,cfg['what'])

# falcon.API instances are callable WSGI apps
app = application = falcon.API()

# Resources are represented by long-lived class instances
igsapi = InterviewGroceryStartupResource()

# ApiTestResource will handle all requests to the '/apitest' URL path
app.add_route('/igsapi', igsapi)
As you may see in the class, I added two methods. on_get is not doing much, the interesting one is on_post. On each post to the specified route, the scripts decodes de body, extracts a JSON object, looks for the property cfg (config) and sends that to the JSON response builder.
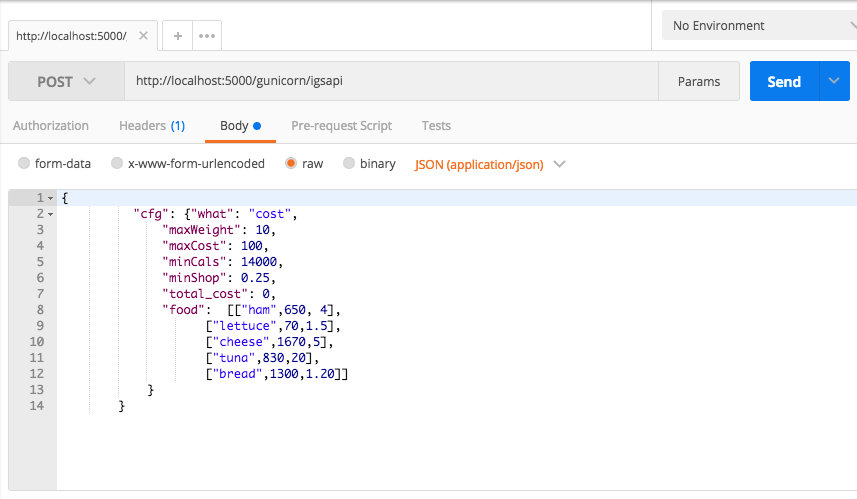
(Yes, this means that whenever you POST, you need to send a JSON object in the body with a “cfg” attribute that looks more or less like this:
{
                    "cfg": {"what": "cost",
                            "maxWeight": 10,
                            "maxCost": 100,
                            "minCals": 14000,
                            "minShop": 0.25,
                            "total_cost": 0,
                            "food":  [["ham",650, 4],
                                        ["lettuce",70,1.5],
                                        ["cheese",1670,5],
                                        ["tuna",830,20],
                                        ["bread",1300,1.20]]
                        }
}
If you are running the API in a different machine than the one serving the webpage, you may have trouble with the same origin policy. In order to address this, you can enable cross-origin resource sharing, CORS.
Add the following class to the code above
ALLOWED_ORIGINS = ['http://localhost';]

class CorsMiddleware(object):
    def process_request(self, request, response):
        origin = request.get_header('Origin')
        if origin is not None and origin in ALLOWED_ORIGINS:
            response.set_header('Access-Control-Allow-Origin', origin)
        response.set_header('Access-Control-Allow-Origin', '*')
And call this class during the API instantiation:
app = application = falcon.API(middleware=[CorsMiddleware()])
Pluggable magic!
You may run this API in port 18000 (or the one you please) by calling gunicorn:
gunicorn interview_grocery_startup_api -b :18000 --reload
Check the gunicorn docs for more options
The Falcon documentation is here.
4 Testing the API
I use the wonderful Postman for testing all the APIs that I make

5 Coding the interface
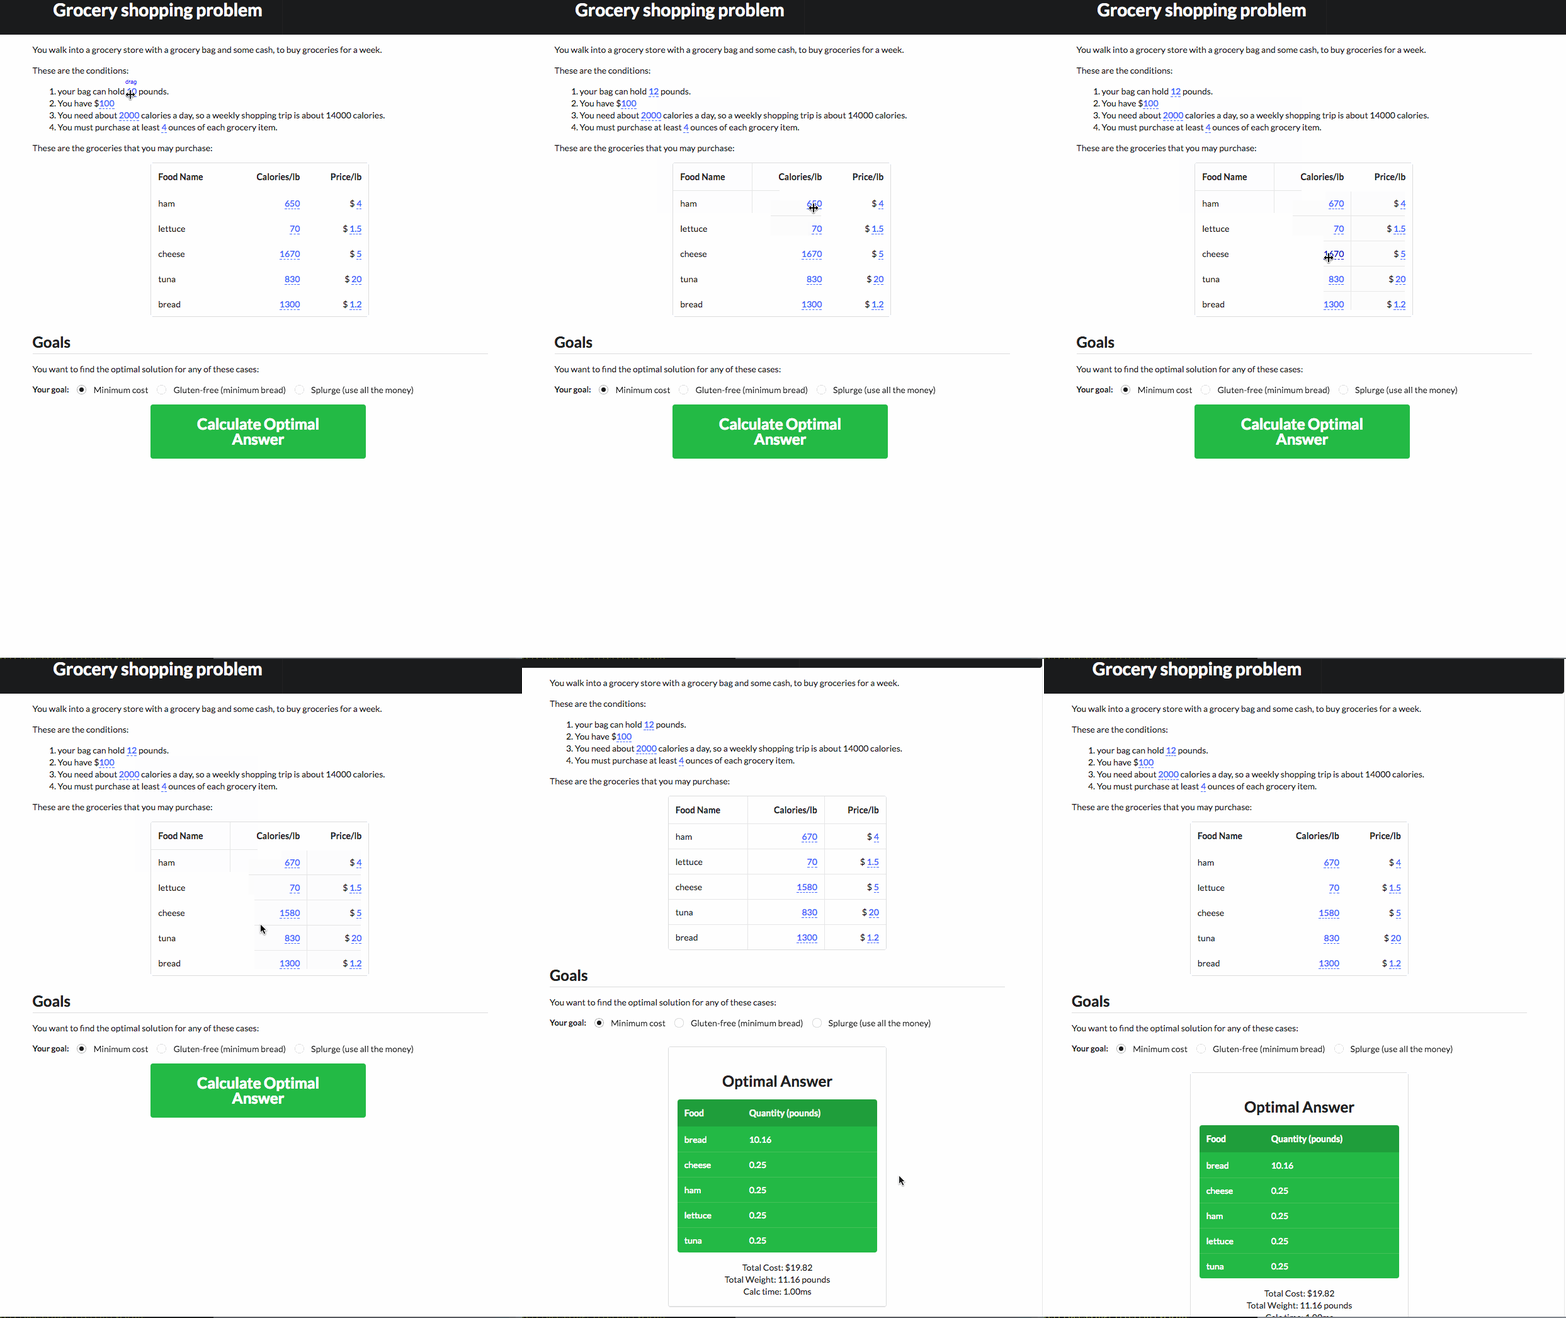
The web interface can easily be an HTML+JS+CSS thingie. I tried to keep it simple creating a single page with 3 parts: a formulation, a data table and a fat green button to get the results.
From the functional perspective, the only thing you need to do is to perform POSTs to the /gunicorn/igsapi endpoint defined in the API script, and then process the response.
Here you can see the javascript file that does everything.
I keep a variable (igs.payload) constantly updated with the JSON payload I’m going to send. And then I just POST whenever I please:
    jQuery.ajax({
      type: "POST",
      url: "/gunicorn/igsapi",
      dataType: "json",
      data: JSON.stringify(igs.payload),

      error:function (xhr, ajaxOptions, thrownError){
          console.log(thrownError);
      },

      success:function(data, textStatus, jqXHR){
        console.log(data);
        igs.fillAnswerTable(data);
      }
    })
The result is sent to a very dirty fillAnswerTable function which builds and re-builds the HTML code for the solution table.
For the UI look and feel I used Semantic UI, my current favorite Bootstrap alternative.
I’m also using Bret Victor’s Tangle library to provide direct manipulation of the variables. Each manipulation fires an event that updates the igs.payload variable.

Next steps
We got our little web app, but it has so many moving pieces. Wouldn’t it be nice to package it in a way that it always works? This will be the subject of a future post.
Containerizing the solution with docker